March 31, 2010

When we started this blog, I didn't realize how ridiculously hard it is to keep up. So bare with us, "craft day" is a coming. Let me here a woop woop!!

March 23, 2010

Spring Flower Wreath

In February's 'craft day', Chantel came up with this CUTE paper spring wreath!


This one is mine, I used pink, orange, and blue paper.


Chantel used the pastel colors on hers.


Start with cute scrapbook paper, ribbon, and we used brads for the centers of the flowers.


Cricut cut flowers in all different sizes.


crinkle the flowers and add ink to edges.


Use either hot glue or use the brad and poke in the styrofoam wreath. We got the wreaths at the dollar store.

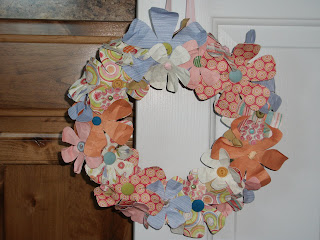
Hang with ribbon and your done. Simple wreath for Spring!
This one is mine hanging on a wreath hanger I made from an idea from shanty2chic blog.


linking to

Photobucket


March 20, 2010

Picture headboard


My husband and I took a trip to Wal-Mart last week to buy a a few necessity items and spend far too much money.  We always do at Wal-Mart.  We were wasting some time walking up and down the aisles when I spied something I've wanted for a while, but had always unintentionally left it off my list.  A full-length mirror.  It's important to see how one's butt looks in a certain pair of jeans before heading out the door.  No sooner had we got home and put away the milk and laid the mirror on the bed to hang up, than my husband leans on the bed, and shatters the middle of the mirror.
I thought, "Great...what am I going to do with this?"  Always one to turn trash into something useful and being one with a need to design on a dime, I figured I would use it as a decor piece.  Note: I did take step-by-step pictures of the process, however; the memory chip yelled at me to be formatted and it erased all my pictures.  YUCK!  It was an easy enough project that I'll be able to explain it.
First, I spray painted the mirror black.  It was white and also plastic.  I took two sheets of patterned paper, cut a half inch off each and glued them on either end of the mirror.  I used Zip-Dry, but I'm sure Mod Podge would work just as well.  I then took two sheets of cardstock, cut a half inch off each of those and glued those in the middle.  I glued ribbon to the inside edge of the patterned paper just to separate them from the cardstock.  I grabbed some vinyl and cut 2" letters from the Lyrical Letters cartridge on my Cricut.  I printed 6 pictures, matted them in black cardstock, added a few embellishments and voila!  Transformation!  I plan on re-doing my bedroom in cream and black so this will fit in there quite nicely.  It was definitely a quick project that only got interrupted three times by the baby waking up to feed.  I wouldn't recommend breaking the mirror before making it was only $5, so really inexpensive to do!

March 09, 2010

My very first tutorial

So me and Chan (a.k.a Chantel) decided to blog and share our love of crafting and such, so we created a month where we get together and each of us have a project planned. We call this day....get ready... Craft day! Pretty catchy huh. huh. My project this month was a menu board. I have seen tons of different menu boards out there, and they are all so cute, but my decorating style is a primitive style (or so I think and wish), and I came up with this one.


I love stars and I'm loving this yellow color! My husband Todd is owner of a restaurant booth and cabinet manufacturer, so I have all the wood and tools at my disposal!! woohoo I love the smell of wood!! So here we go with the tutorial....

I went and scoured the wood pile and found a pretty good size piece of thin plywood. I didn't want it to be to heavy as I have it hanging on my pantry door. The size I cut it out was 21x12 inches. Plywood has a smooth surface and doesn't need to be sanded before you paint it!! A step I HATE to do! I like fast projects and I am not patient!


Please excuse my photo taking. I'm not good at it! AT ALL!! Next project I'll have my daughter who is a pro take them. So bear with me!! I went ahead and painted it with chalkboard paint in the spray can. We painted the the top part a yellow acrylic paint that you can get at Walmart or any craft store.


I went and sanded the edges just to get a little worn look. Oh I forgot the little piece of scrap wood that I added to the board where the black and yellow meet. (I told ya I was bad at pic taking). Sand the edges of that as well.


I LOVE Minwax Gel Stain in Walnut!! It becomes a little sticky after it is applied an until it dries, but I like the look it gives over regular stain. Apply this to all pieces, let dry. Since I forgot the pics for the painting of the star and everything I will just let you know what I did. The star I had for this project was something I picked up at a craft store on clearance. It was and ugly gold and I went ahead and painted it black and then the same acrylic yellow. Sanded and then used the gel stain. Use wood glue and apply star and wood trim piece. AND....... take a breath now, Its over, I finished (although not great) the tutorial!!!

The finished project hanging on my pantry door!!! My son decide to go ahead and plan this week's menu!! Good choices!!! Thanks til next time.


linking to

March 05, 2010

Introduction

We are two sisters who needed a little motivation to get our many projects finished.  We love crafting and have a blasty blast when we craft together.  We love surfing the other craft blogs for inspiration and decided to steal another one of their ideas and start our own craft blog.  So sit back, have a rum and coke, and get inspired!!